In Exchange 2019, viewing and assigning an SSL certificate services is basically the same as Exchange 2013 and 2016.
In this example we will use PowerShell to firstly view the certificates we have and then assign services to that SSL certificate along with setting POP/IMAP to use the SSL certificate as well.
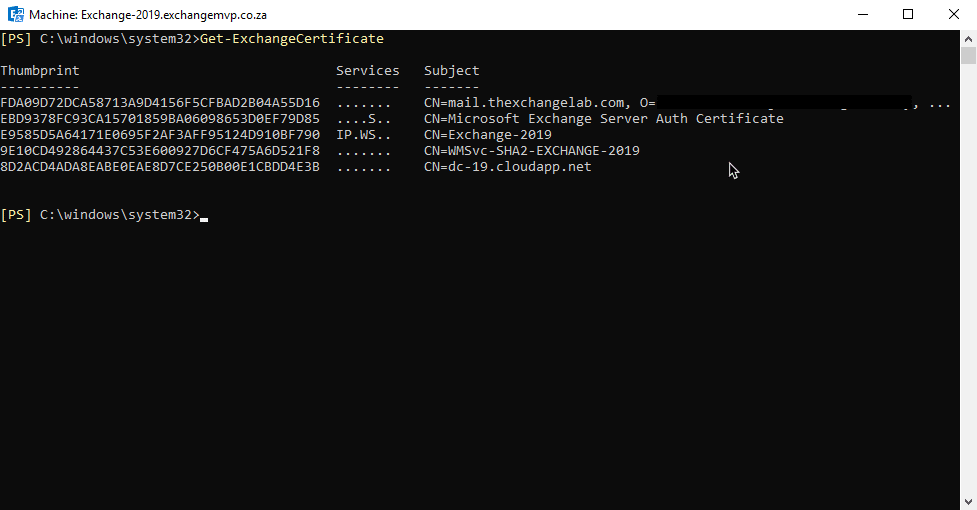
Launch the Exchange Management Shell (EMS) and run the following command:
- Get-ExchangeCertificate

Now that we can see all our certificates along with the SSL one, we can assign services to it, you can do this by running the following command:
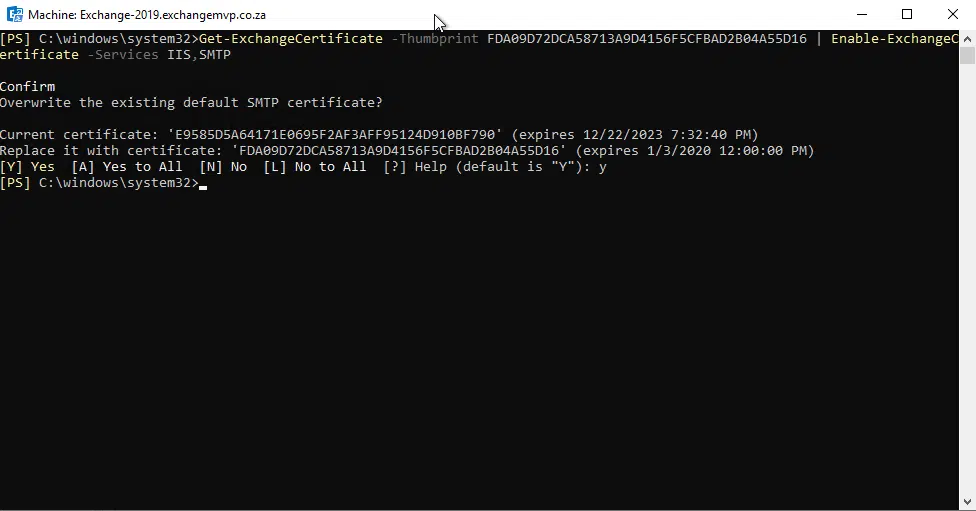
- Get-ExchangeCertificate -Thumbprint <ID Here> | Enable-ExchangeCertificate -Services IIS,SMTP
Press enter and it will take a few seconds and you will get a prompt to confirm overwriting the existing default certificate, make your selection to proceed, in our example we chose yes:

In the last step, we will set the POP/IMAP settings to use the X509 certificate, here are the commands below:
For POP, you can run the following command:
- Set-POPSettings -Server <Server Name> -X509CertificateName pop.thexchangelab.com

For Imap, you can run the following command:
- Set-ImapSettings -Server <Server Name> -X509CertificateName imap.thexchangelab.com

Remember to restart the services for the changes to take effect.
Hope it helps.
